


-
Library of various blocks and drawings
Call options
- ModPlus floating menu or palette
- Menu, toolbar, or ribbon in nanoCAD
- Command line: _mncDwgBase
Icon


Using
The plugin can work with two bases: ModPlus base and User base, which are selected in the drop-down list in the upper left part of the window.
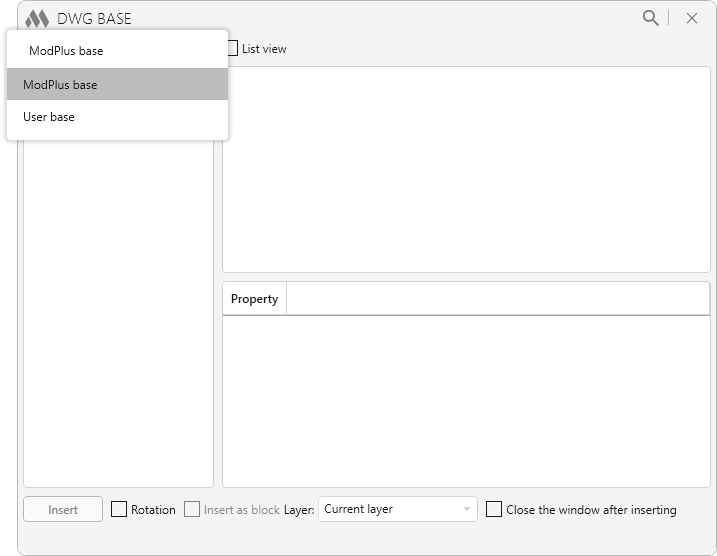
MODPLUS BASE
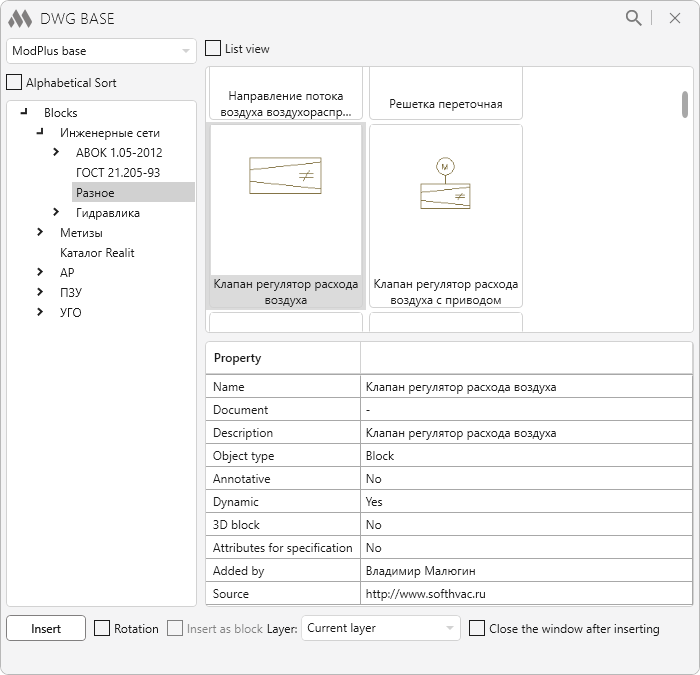
In the left part of the plugin window there is a list of blocks and drawings available in the base. The list has a tree structure and can be sorted using the Alphabetical Sort option.
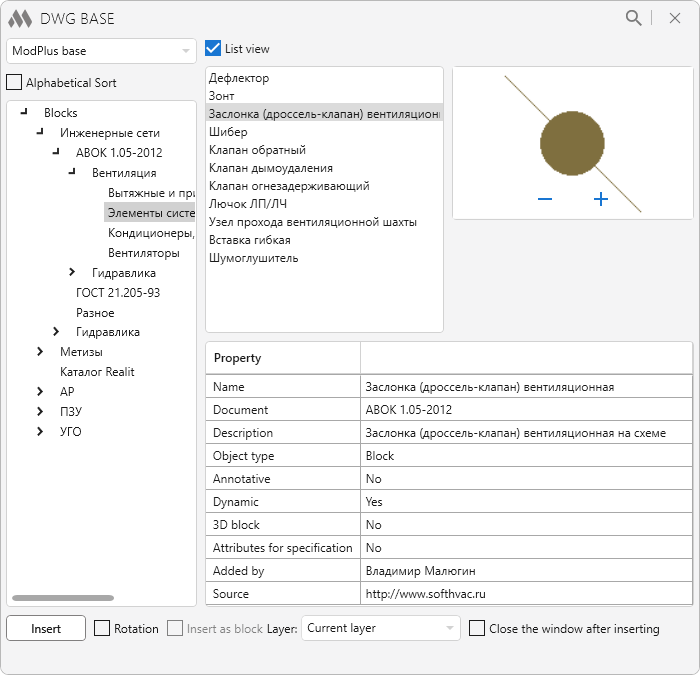
When you select an item in the list, the list of elements available for insertion is displayed in the field in the middle upper part of the window. If the List view option is enabled, the list of elements is displayed, if it is disabled, the elements are displayed as tiles. When you select an individual element in the list, the properties table of the element is filled in the field in the lower part of the window, and in the field in the upper right part of the window you can see the image of the element.
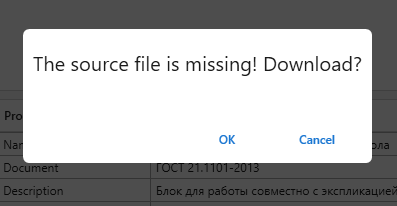
Files containing blocks and drawings are not downloaded when the plugin is installed. Therefore, the first time an element is inserted, a dialog box appears with a suggestion to download the source file:
In the lower part of the plugin window there is a button for inserting an element, as well as options for customizing the insertion:
Rotation – allows you to specify the rotation angle when inserting an element
Insert as block – this option is available for drawings, it allows you to insert a drawing as a block
Layer: – allows you to select the layer to insert from the drop-down list of project layers
Close the window after inserting – if this option is enabled, the plugin window will be closed after inserting an element.
USER BASE
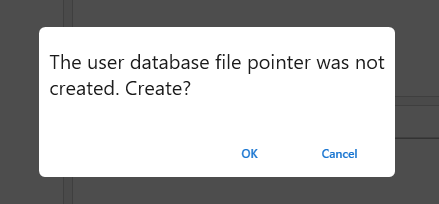
The first time you start the user base, a dialog box appears prompting you to create a user base file pointer:
If you select user base, additional tools for adding and managing user elements appear in the plugin window.
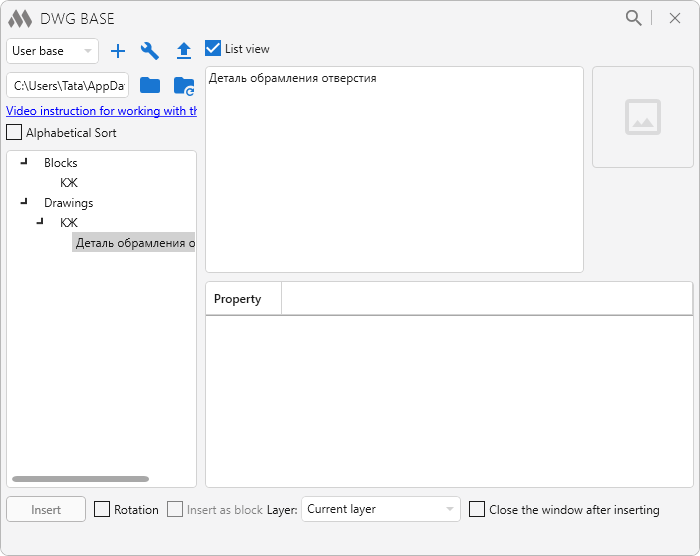
By default, user base files are saved to the ModPlus Data/DwgBase directory (the full path is specified in the corresponding field in the upper left part of the plugin window). Using
 , you can specify a different path to store the folder with the user base. You can restore the default value of the path to the user base storage folder with
  .
.To add a block or a drawing to the base you should click
 and make a choice in the opened dialog box: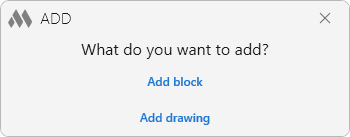
When selecting a block, the following dialog box opens:
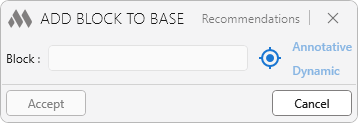
After clicking
 you should select the block in the current document. After that the dialog box will look as follows: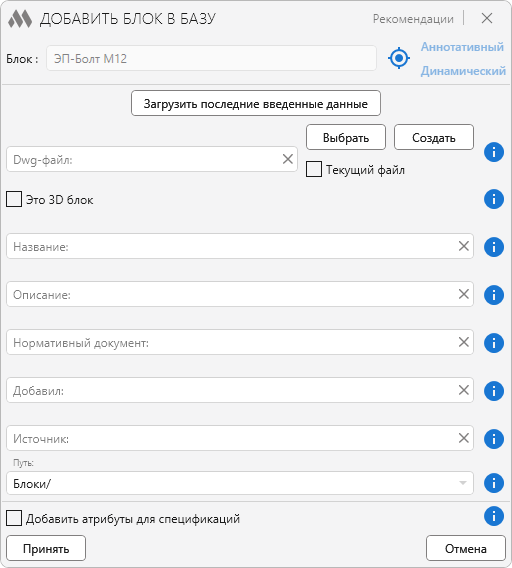
The Recommendations is located in the upper part of the dialog box, which opens the window with the basic requirements for the blocks to be added. There are tooltips opposite the options and fields in this window.
If the current file in which the block was selected is located in a subdirectory of the ModPlus Data/DwgBase directory, then the Current File option should be checked. Otherwise, it is necessary to Select a file in the above mentioned directory or Create a new file using the corresponding buttons. If the block to be added is a three-dimensional one, you should check This is a 3D block option.
Then the following fields should be filled in:
- Name – the name of the block that is displayed in the plugin window
- Description – brief description of the block
- Normativ document – the source regulatory document. If there is no document, the field should be left empty
- Added by – name and surname of the person who added the block
- Source – source where the block was taken from in case the adder is not the author of the block.
- Path – conditional path to the block in the directory that forms the tree structure. Each conditional subdirectory should be separated by a "/"
The Add attributes for specifications option allows you to add attributes for specifications to the block. Attribute values can be changed in the block properties after it is inserted using this plugin. After enabling the option, a table becomes available where you can fill in the default attribute values.
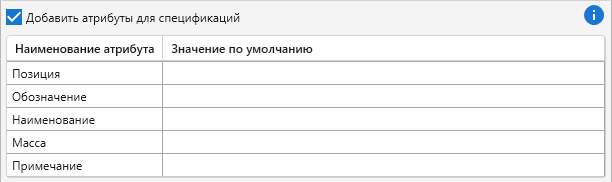
After clicking the Accept, the block will be added to the list of User base blocks.
The window for adding a drawing is similar to the window for adding a block:
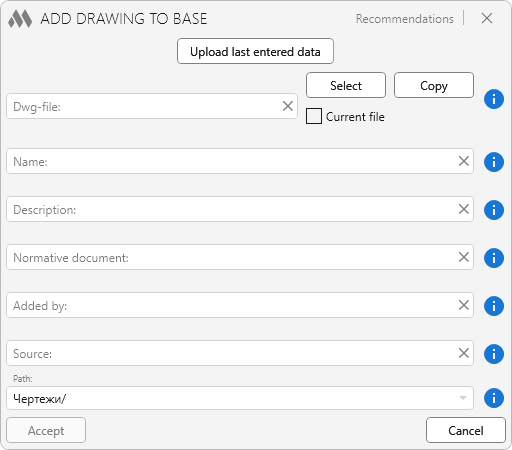
If the drawing file is already in a subdirectory of the ModPlus Data/DwgBase catalog, click Select and specify the drawing you are looking for. If the drawing is in a subdirectory of the ModPlus Data/DwgBase catalog and is currently open, check the Current file checkbox. If the drawing file is not in a subdirectory of the ModPlus Data/DwgBase directory, it can be copied using the Copy.
Next, it is necessary to fill in the fields similar to those in the add block window. After clicking the Accept, the drawing will be added to the list of User base drawings.
To manage the current User base, you can use the dwg User Base utilities
 :
: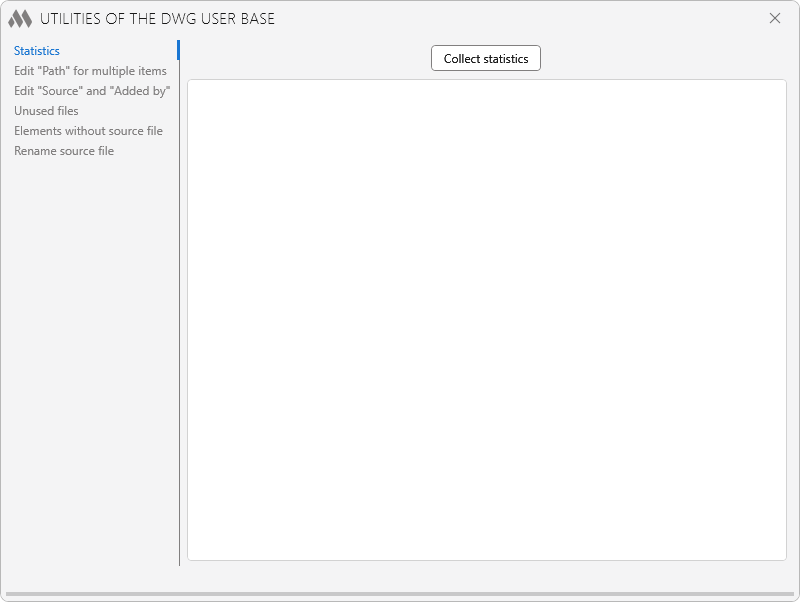
In the left part of the opened window there is a list of utilities located on separate tabs.
Statistics
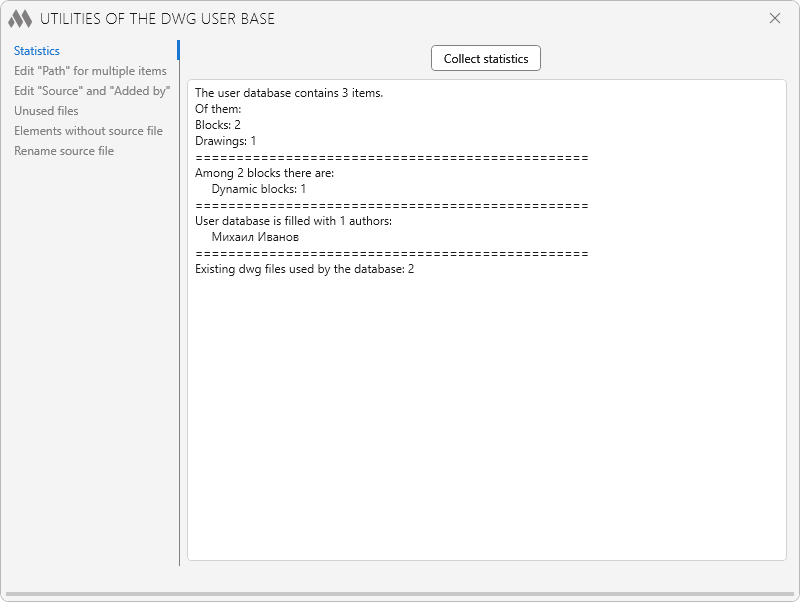
Allows you to display basic information about the User base: the total number of elements, including blocks and drawings, the number of dynamic and static blocks, the number of authors, the number of existing dwg-files used by the base, the number of invalid references to dwg-files.
To get the information, you need to click Collect statistics.
Change "Path" for multiple items
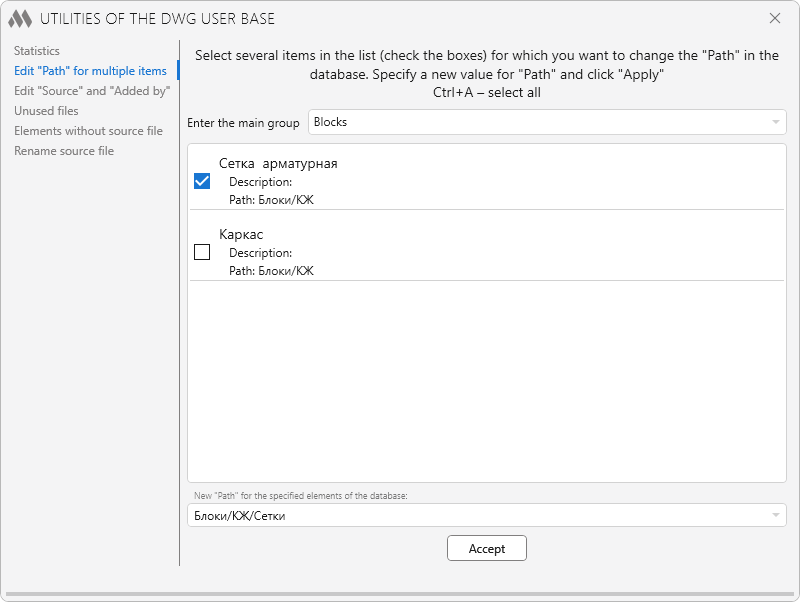
Allows you to batch change the "Path" value in the base catalog for the checked elements.
To do this, you must check the required items in the selected group, and then specify the new "Path" in the field at the bottom of the window and click Accept.
Edit "Source" and "Added by"
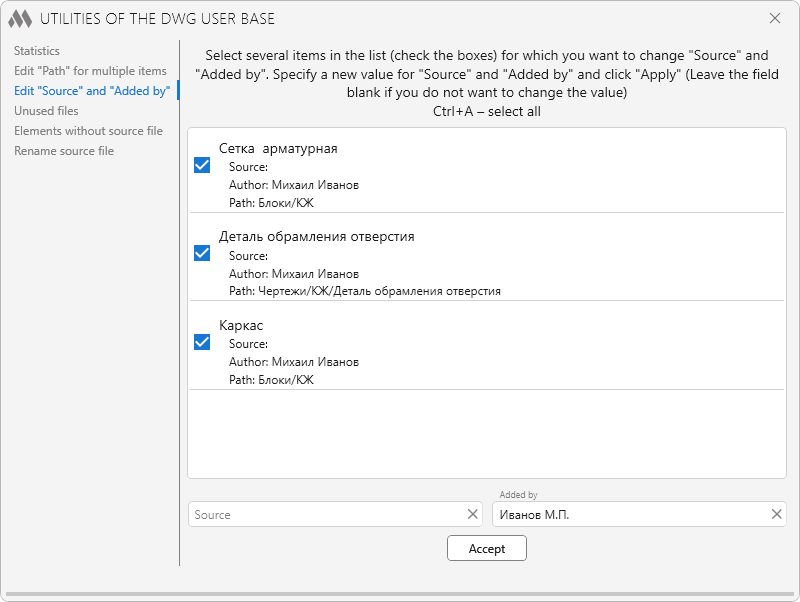
Allows you to batch change "Source" and "Added by" values for the checked elements.
To do this, you should check the necessary items, and then specify new values in the fields at the bottom of the window and click Accept. If you do not need to change one of the values, the corresponding field should be left empty.
Unused files
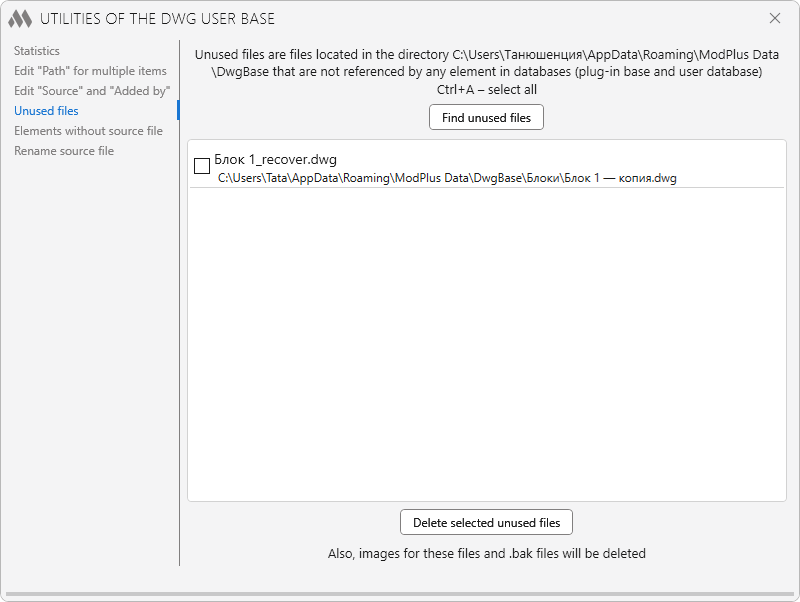
Unused files – files located in the ModPlus Data/DwgBase directory that are not referenced by any element in the bases (ModPlus base and User base).
After clicking the Find unused files, a list of the corresponding files is displayed, which can be deleted using the Delete selected unused files button.
Elements without a source file
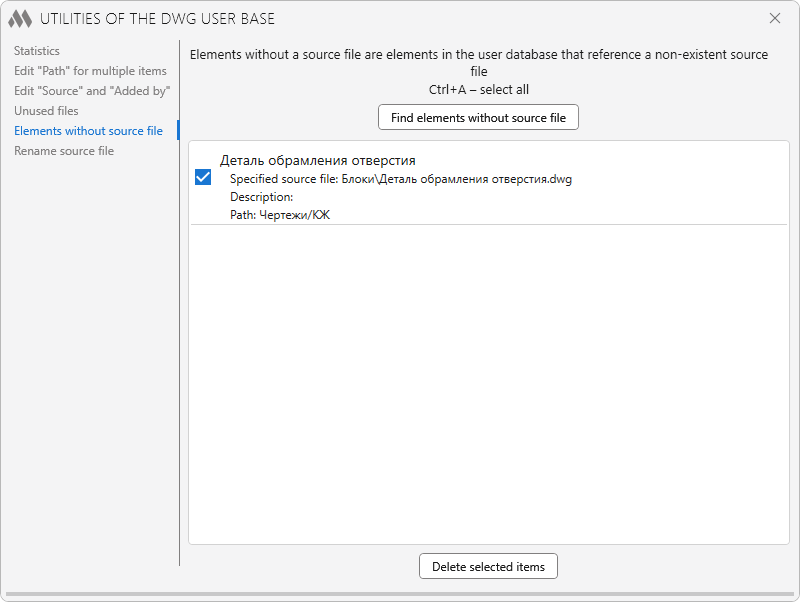
Elements without source file – elements in the User base that refer to a non-existent source file.
After clicking the Find items without source file, the list of the corresponding files is displayed, which can delete selected items using the Delete.
Rename source file
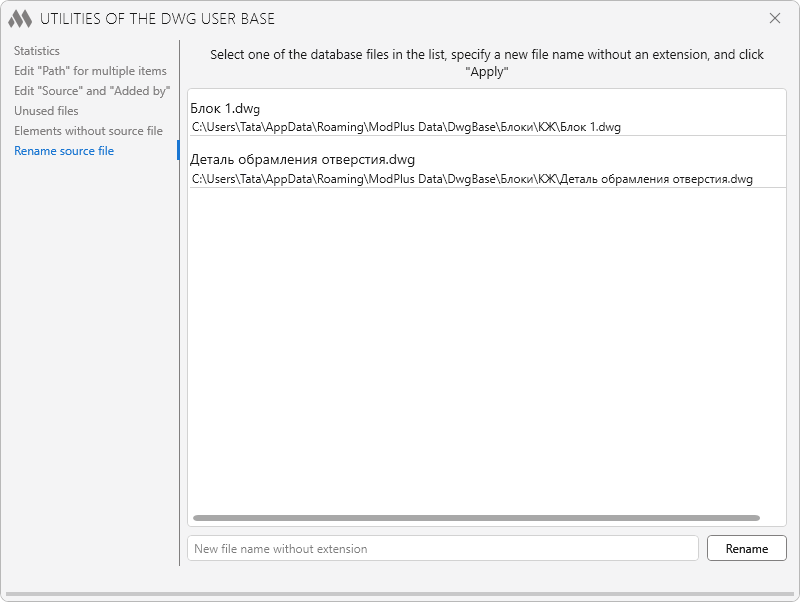
To change the name of the source file, select the file in the list and enter a new name without extension in the field at the bottom of the window, then click Rename.
If you want to add blocks and drawings from the User base to the ModPlus base, you need to send them to the modplus.org server. To do this, you need to use the corresponding
 .
.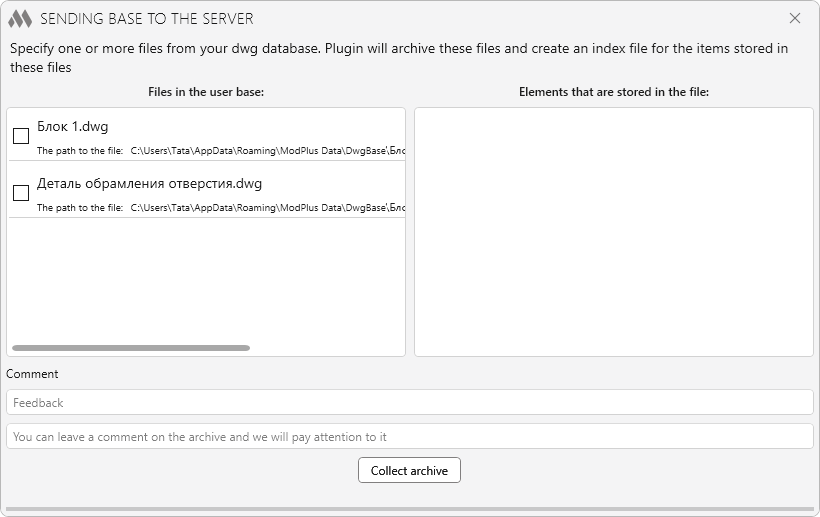
The left part of the opened window contains the list of source files of the User base. When selecting a source file, the list of elements stored in this file appears in the right part of the window. The files to be sent should be checked. They will be collected in the archive for sending.
In the Feedback field you should specify the sender's contacts (e-mail, link to social networks, etc.) in case you need to adjust the sent blocks (drawings).
After clicking the Collect archive, the files will be added to the archive and three buttons will appear at the bottom of the plugin, allowing you to View archive, Delete archive or Send archive to server.
After you send the archive to the server, the files are checked by a moderator and a decision is made to add the elements to the ModPlus base.
-