Creating annotations – dimensions, spot elevations, tags – on section views
Icon
Related news and articles
Usage
Running the plugin is available only on "Section" and "Elevation" views.
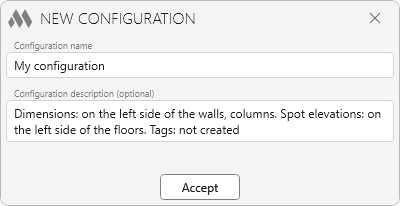
The plugin works by creating configurations  , which define the rules for generating annotation elements for three groups – dimensions, spot elevations, tags.
The upper part of the window contains a drop-down list of configurations. To the right of the list, the following buttons are available:
 – edit name and description of the current configuration.
 – duplicate the current configuration.
 – export the current configuration. When pressed, a dialog box opens where you can specify the path to save the configuration as an XML file.
 – import a configuration. When pressed, a dialog box opens where you can select the XML file of the user configuration to load.
 – permanently delete the selected configuration.
Below are groups with settings for annotation creation rules (described further below).
The lower part of the window contains two buttons for creating annotations:

Process all elements – all elements in the current view will be processed. This option is suitable for local sections.
Process selected elements – only the selected elements in the current view will be processed. This option is suitable when processing part of a large section. After pressing the button, you need to choose how to select elements: Select by elements by restangle or Pick elements.
The plugin also processes preselected elements. In this case, a Process pre-selected elements button will appear at the bottom of the window.
In all three cases, only the groups and subgroups of annotation rule settings that are checked will be processed.
Display annotation errors – when enabled, all errors encountered while creating annotations will be displayed in the results window, showing the IDs of unprocessed elements.
Delete previously created annotations – when enabled, previously created annotations from the same group as the new ones will be deleted.
Each of the three annotation rule groups follows the same structure: in each group, you need to add subgroups of rule settings for individual element categories:
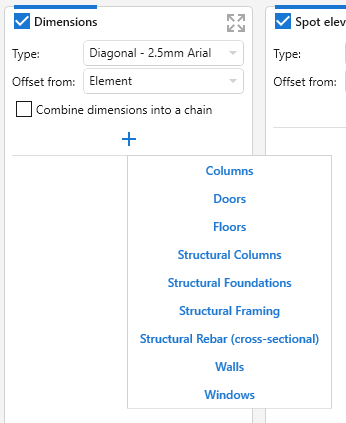
Each group also contains common settings that can be used for each subgroup.
The Offset from option in all groups and subgroups defines the starting point for annotation placement. If From element or From all elements is selected, the starting point is taken from the bounding rectangle built around the geometry of the element(s).
If "Use general settings" is selected in the Type and Offset from fields of the group, the group’s general settings will be applied.
In the upper-right corner of each group, there is a button .png) that expands the group to the full width of the window.
that expands the group to the full width of the window.
The general option Combine dimensions into a chain adds post-processing for created dimensions: if the dimension lines lie on the same straight line, they will be combined into one dimension chain.
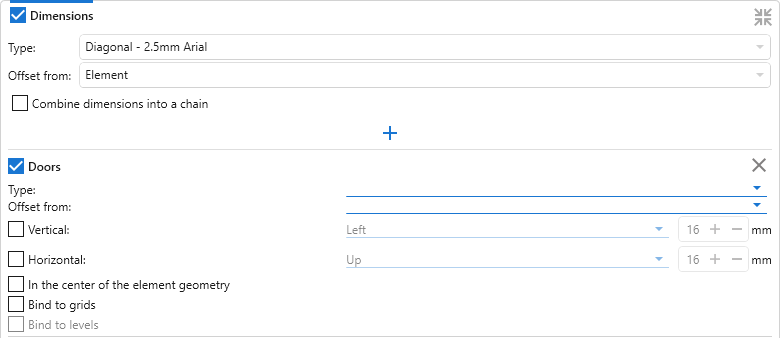
In the center of the element geometry – when enabled, the plugin attempts to create a dimension at the geometry center. It is recommended to use this option in obvious cases, such as a horizontal dimension for the “Walls” category or a vertical dimension for the "Floors" category.
Bind to grids, Bind to levels – when enabled, grids or levels perpendicular to the dimension line will be used when creating the dimension.
For the "Structural Rebar (cross-sectional)" category, additional options are available:
- Create – allows you to choose the annotation method: Dimensions or Multi-rebar annotations .
- Display equality formula – allows combining dimensions with identical spacing.
For the categories "Ducts", "Cable Trays", and "Pipes", additional options are available:
- Axias – when enabled, centerline dimensions of elements will be created in section and in plan.
- Overall – when enabled, overall dimensions of elements will be created in plan.
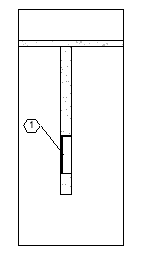
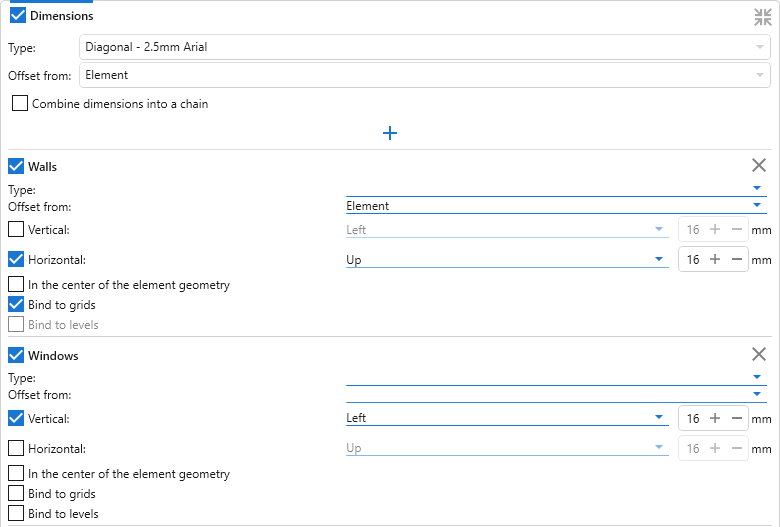
For example, you need to place a horizontal dimension downward with an offset from the element and aligned to a grid for a wall, and a vertical dimension to the left with an offset from the crop region boundary for a window.
Set the following options in the plugin window under the Dimensions group:
Click the Process all elements button to get:

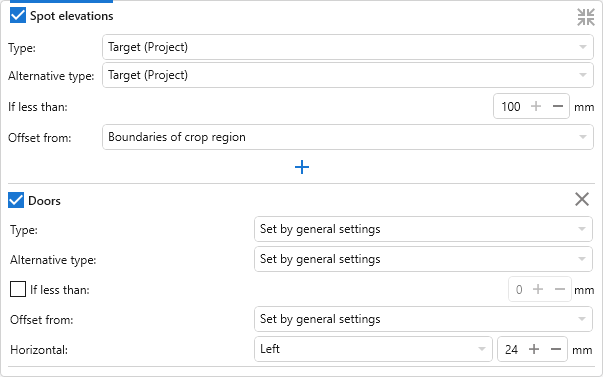
Alternative type – applied when the scaled distance between two spot elevations in the view is smaller than the value specified in the If less than field.
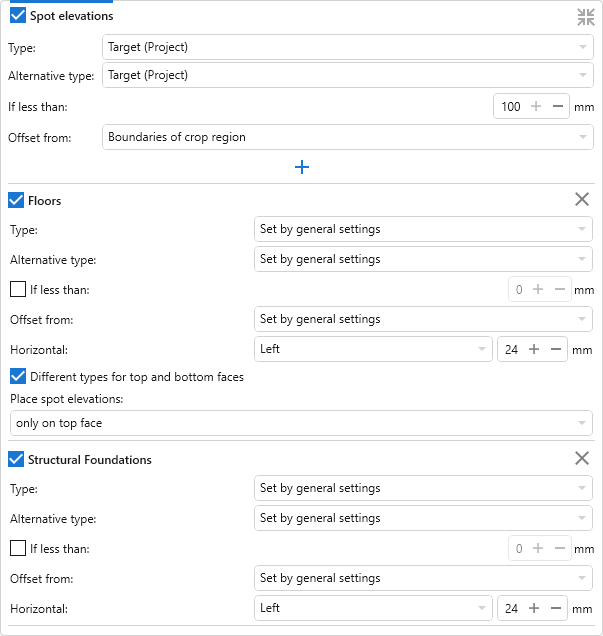
For the "Floors" category, additional options are available:
- Different types for top and bottom faces – when enabled, Type will be used for the top face and Alternative type for the bottom face.
- Place spot elevations: – choose the placement method: on top and bottom faces, only on top face, or only on bottom face.
For the categories "Ducts", "Cable Trays", and "Pipes", additional options are available:
- Axias – when enabled, centerline elevation marks of elements will be created in section and in plan.
- Overall – when enabled, overall elevation marks of elements will be created in plan.
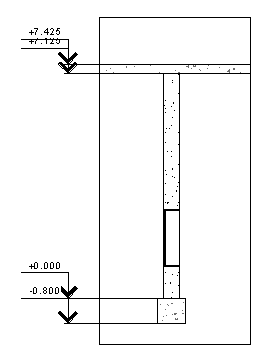
For example, you need to place level marks for a floor and a foundation. Select them in the view and run the plugin. In the spot elevations group, set the following options:
Click the Process pre-selected elements button to get:
For tags, the type must be specified for each processed element category.
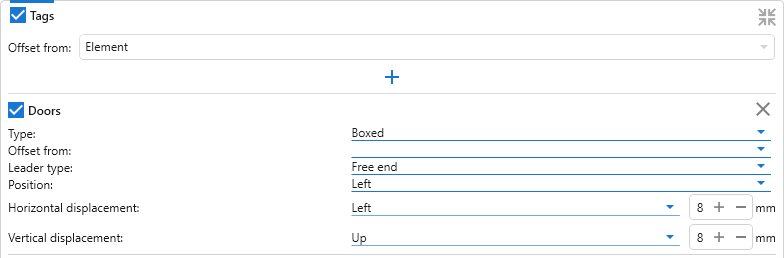
The end of the tag leader is placed at the center of the processed element’s geometry or at the point closest to that center.
For the "Structural Rebar" category, post-processing is applied – if tags are arranged in a line and tag rebars with the same type and tag value, only one of the created tags is kept.
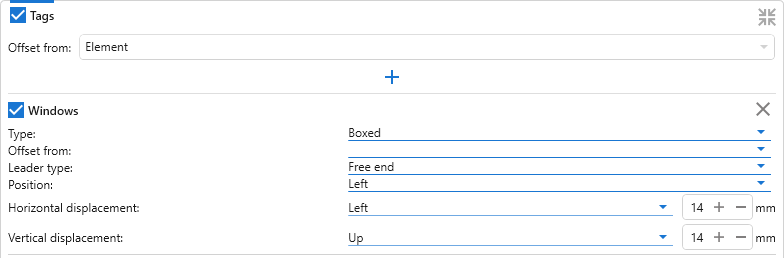
For example, to tag a window with a free-end leader on the left and an offset from the element, set the following options in the Tags group:
Click Process selected elements, then Pick elements, select the required window in the view, click the “Finish” button on the Revit ribbon, and get: